Android Hello Application
Prepared By:- Tech Altum
How to Add Android Project
Start Android Studio and choose option Start a new Android Studio Project. Give a proper name to the application the domain (it can be anything).
 Figure 1
Click on next and you will get the following window. In this window you can choose the devices in which you want to run your app. For this tutorial I am selection mobile and tablet. We have to choose the minimum SDK Version.
 Figure 2
After pressing next you will get following window to choose activity. As I already explained in my last article activity is the screen or UI for android. So we need to choose the screen. For the initial stage we will choose the blank activity to work.
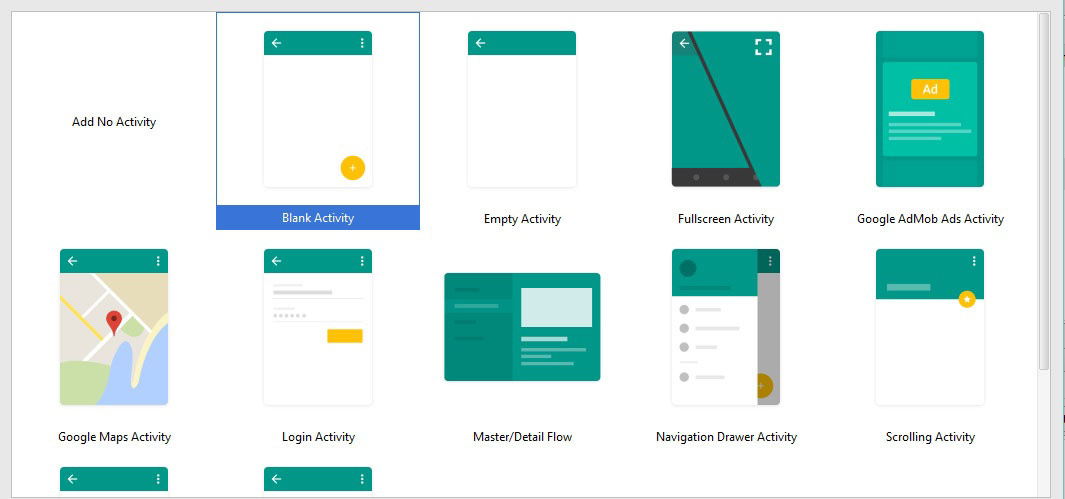 Figure 3
After pressing next you will get the following window. Every Activity is associated with two files i.e your java file and your xml file. Activity name is the java file name and layout name is your xml file name. menu_main is our android menu name which is stored inside the menu folder in res.

And click on the finish. After completing the wizard you will get your android project.
 Figure 5
You can see two main areas these are app and Gradle Scripts. Gradle is the build tool for android application. When we add new android projects these scrips are added automatically.If you expand the app then you will find the following files
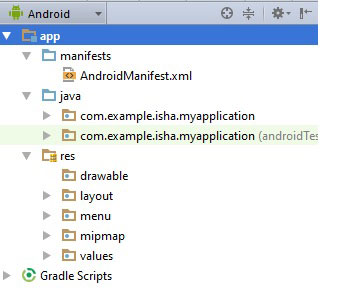 Figure 6
Manifests: - every android app must have AndroidManifests xml files in its root directory. It contains the permissions and component used in the app.
Java: - in this folder we have all the java files of activities and unit testing files.
Res: - res is our resources folder. It contains others files like images, videos, xml etc.
- Drawable:-All the images which we need to use in our android app will be stored in drawable folder.
- Layout:- it contains the UI files which is corresponds the activity. These are the xml based files.
- Menu:-This folder contains the xml file in which we add the elements which we need to show in android top menu. For every activity we have this menu xml file.
- Mipmap: - it contains the android launcher icon. We need an icon in different density so that it can support all devices.
- Values: - This folder contains other xml files like color, dimens, strings and styles etc.
Now click on run button on top or press shift+F10 and launch the emulator
 Figure 7
 Figure 8
Now click ok and your app will be get executed in the following emulator.
