View in MVC
Written By:- Isha MalhotraWhat is View in MVC
In MVC “V” stands for View. View is basically a User Interface(UI) in MVC.
In this article I am just giving an introduction of VIEW.
In MVC we can create view in two manner which is either in .aspx form or in Razor which is in .cshtml or .vbhtml.
What is Razor View Engine
Razor is very powerful concept which is introduced in MVC 3. Razor is simply a new programming language which allows you to embed your C# and VB code with HTML.
When we create Razor for C# then it add .cshtml file but when we create Razor with vb then it add .vbhtml file.
In my next article series I will discuss Razor with its syntax in detail. For this article I am focusing on how to create view, how to call view from controller etc.
Example of View
As we know that in MVC application first a Controller invoked and in controller class we create method which is called action.
In this example I am creating controller name tech altum and creating method name string_concat(). In my Controller article I created method which return string but here I want to return View so its return type must be either ActionResult or ViewResult. I will focus on these two in my next articles series
Controller Code
		using System;
using System.Collections.Generic;
using System.Linq;
using System.Web;
using System.Web.Mvc;

namespace MvcApplication3.Controllers
{
    public class TechaltumController : Controller
    {

        public ActionResult string_concat()
        {
            return View();
        }

    }
}
Now let’s create its view. Following are the steps to create view
Step 1
Right click on method for which you want to create view and select option add view.
 Figure 1
Step 2
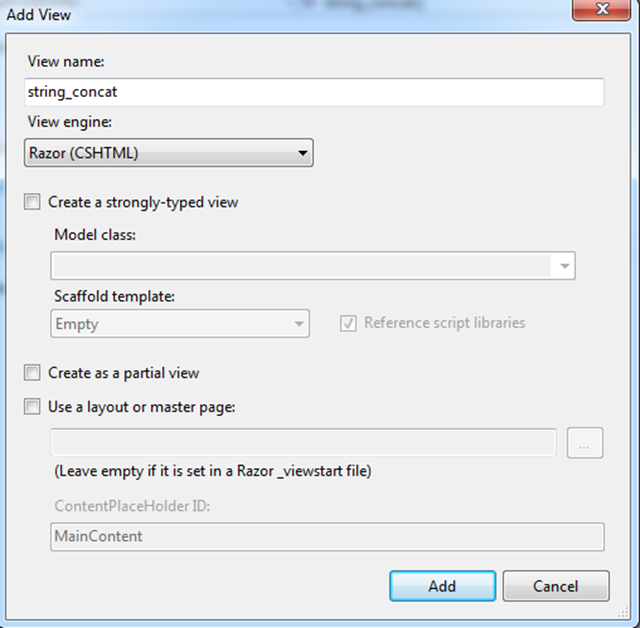
Now add View
 Figure 2
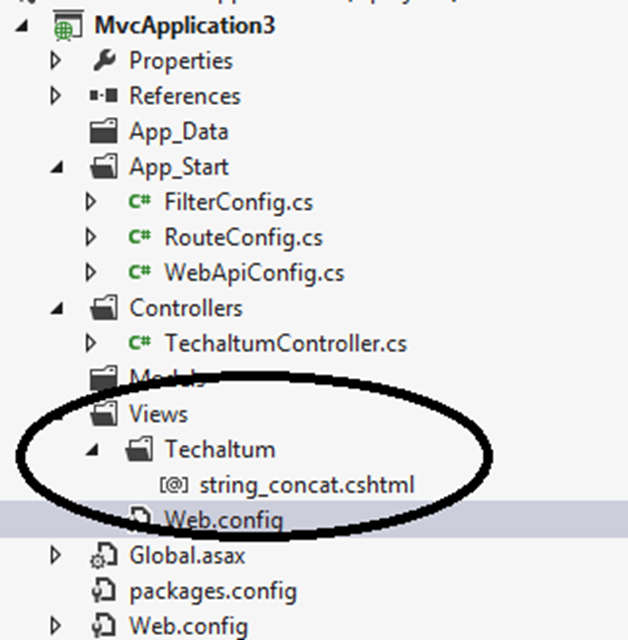
Now you can see that it create folder with name of controller and then add .cshtml file with name of method in View Folder.
 Figure 3
Now create html code in this file and add javascript which concatenate both string
Code of View File(.cshtml)
		@{
    Layout = null;
}

<!DOCTYPE html>

<html>
<head>
    <meta name="viewport" content="width=device-width" />
    <title>string_concat</title>
</head>
<body>
    <script type="text/javascript">
        function concat()
        {

            var x = document.getElementById("fname").value;
            var y = document.getElementById("lname").value;
            var res = x + " " + y;
            alert(res);

        }
    </script>
    <table>
        <tr>
            <td>Enter First Name:-</td>
            <td><input id="fname" type="text" /></td>
        </tr>
        <tr>
            <td>Enter Last Name:-</td>
            <td><input id="lname" type="text" /></td>
        </tr>
        <tr>
            <td></td>
            <td><input id="Button1" type="button" value="Full Name" onclick="concat()" /></td>
        </tr>
    </table>
</body>
</html>
Route Config File code
Now map this route in App_Start-> RouteConfig.cs
		using System;
using System.Collections.Generic;
using System.Linq;
using System.Web;
using System.Web.Mvc;
using System.Web.Routing;

namespace MvcApplication3
{
    public class RouteConfig
    {
        public static void RegisterRoutes(RouteCollection routes)
        {
            routes.IgnoreRoute("{resource}.axd/{*pathInfo}");

            routes.MapRoute(
                name: "Default",
                url: "{controller}/{action}/{id}",
                defaults: new { controller = "Techaltum", action = "string_concat", id = UrlParameter.Optional }
            );
        }
    }
}
Now you can see the code of controller as it’s just a simple class which inherits the controller class and it’s showing index method. Let’s delete the whole code from the class and create your own method in a following way:-
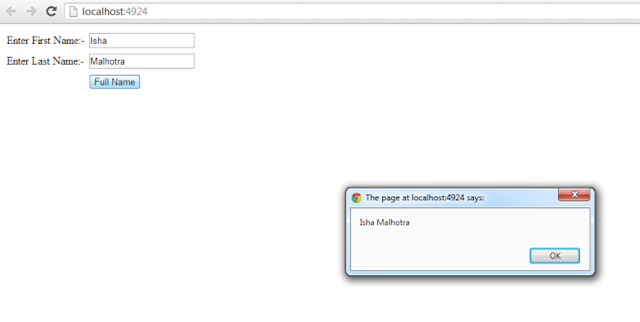
Now execute this code and check the result
 Figure 4
Similarly you can add more method in controller and can add view according to them. The power of MVC is that with in single controller you can create multiple view. In my next article series I will discuss more about this topic. For this article this is just introduction of View in MVC.