Scaffolding using EF in MVC
Written By:- Isha Malhotra
Introduction
In my last article series I explained how to work with scaffolding using LINQ. In this article series I will explain how to work with scaffolding using Entity Framework.
Note: - if you are new to scaffolding then Click Here and if you are new to Entity Framework then Click Here.
In this article I am going to explain how to show data using scaffolding LIST option with Entity Framework.
Table Name:-Student Schema:- Structure:-
create database scaff_ef
use scaff_ef
create table student(stu_id int primary key identity(1,1), name varchar(100), age int, course varchar(100))
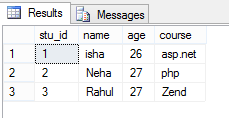 Figure 1
Firstly add MVC application. Go to visual studio->file->new-Project->add mvc application and choose basic application.
Now right click on mvc application and add new item. Select data from right tab and select Ado.net Entity Data Model and give it proper name and click on Add.
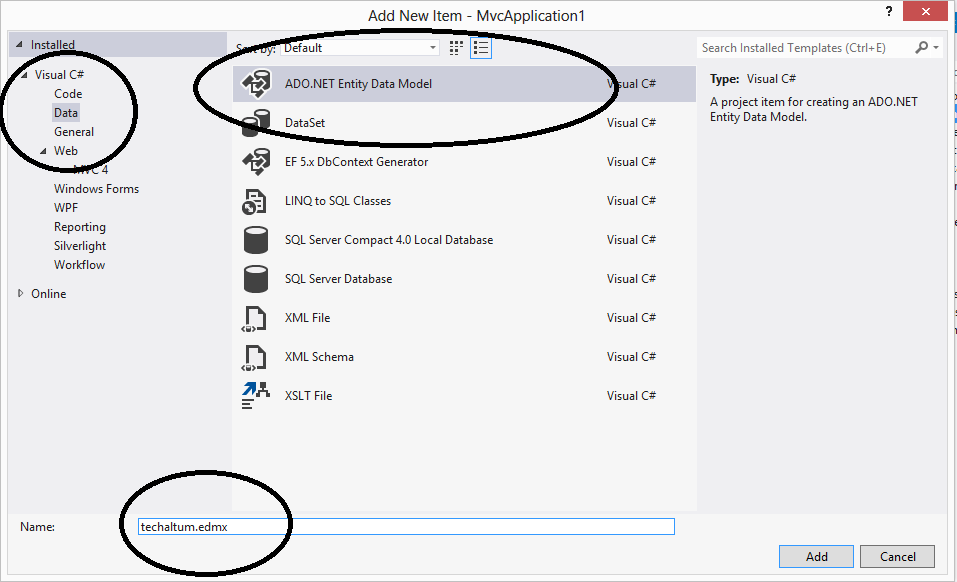 Figure 2
When you click on Add you will get following window in which choose Generate from Database as we already created database. And click on Next.
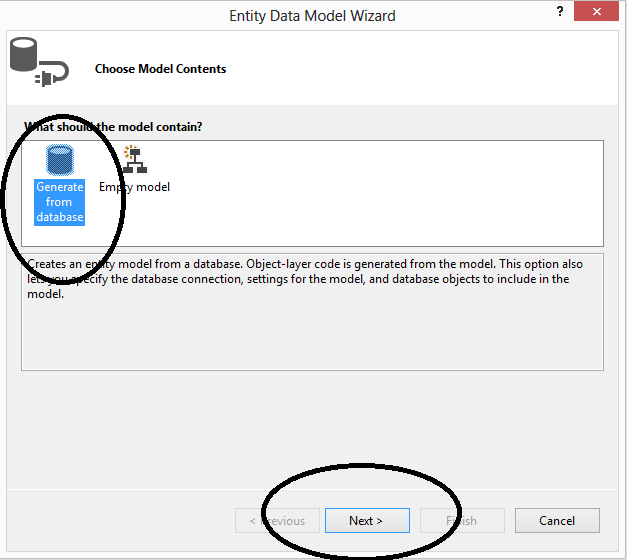 Figure 3
After clicking next you will get a window where you have to select database. Click on New Connection and you will get following window:- Set your connection here and choose database and click on ok.
 Figure 4
When you click on ok you will get following window in which it showing by which name it saving connection string in Web.config file.
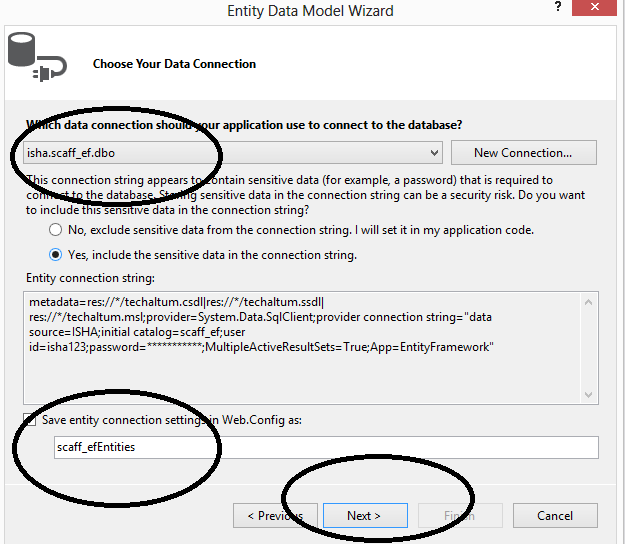 Figure 5
When you click on next button you will get following window in which now you have to choose your tables, view and stored procedure. It will also allow you to give name of namespace in which code file will be stored.
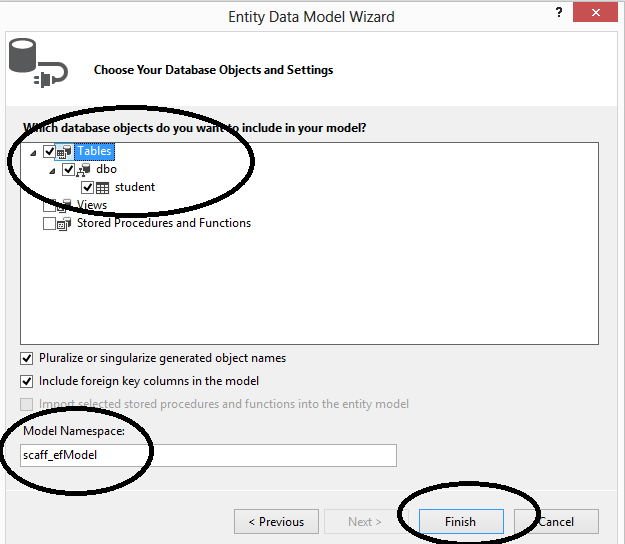 Figure 6
Now click on finish button and you will find your EF code in MVC application.
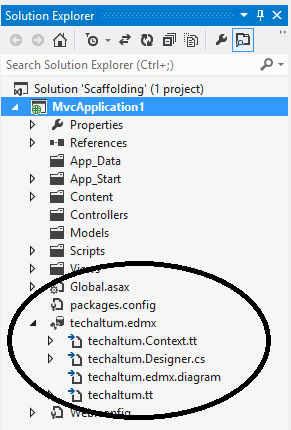 Figure 7
Note: - Please click here if you want to go in detail in edmx file.
Now build this solution and add controller with name Home Now add view for Index Action. As we know right click on Index and select Add View and you will get following window:-
 Figure 8
As you can see that our table name was student which we added so my model has been created using same name student. As you click on add button you will get the index view with complete code.
Index.cshtml
@model IEnumerable<MvcApplication1.student>

@{
    Layout = null;
}

<!DOCTYPE html>

<html>
<head>
    <meta name="viewport" content="width=device-width" />
    <title>Index</title>
</head>
<body>
    <p>
        @Html.ActionLink("Create New", "Create")
    </p>
    <table>
        <tr>
            <th>
                @Html.DisplayNameFor(model => model.stu_id)
            </th>
            <th>
                @Html.DisplayNameFor(model => model.name)
            </th>
            <th>
                @Html.DisplayNameFor(model => model.age)
            </th>
            <th>
                @Html.DisplayNameFor(model => model.course)
            </th>
            <th></th>
        </tr>

    @foreach (var item in Model) {
        <tr>
            <td>
                @Html.DisplayFor(modelItem => item.stu_id)
            </td>
            <td>
                @Html.DisplayFor(modelItem => item.name)
            </td>
            <td>
                @Html.DisplayFor(modelItem => item.age)
            </td>
            <td>
                @Html.DisplayFor(modelItem => item.course)
            </td>
            <td>
                @Html.ActionLink("Edit", "Edit", new { /* id=item.PrimaryKey */ }) |
                @Html.ActionLink("Details", "Details", new { /* id=item.PrimaryKey */ }) |
                @Html.ActionLink("Delete", "Delete", new { /* id=item.PrimaryKey */ })
            </td>
        </tr>
    }

    </table>
</body>
</html>
As you can see that in actionlink it is not showing primary key column so first we have to add this primary key. In our table stu_id is a primary key. So replace these actionlink with following code:-
				@Html.ActionLink("Edit", "Edit", new {  id=item.stu_id }) |
                @Html.ActionLink("Details", "Details", new { id=item.stu_id }) |
                @Html.ActionLink("Delete", "Delete", new { id=item.stu_id })
Now move the Index Action in Home Controller and add code to select data from database using EF.
		public ActionResult Index()
        {
            scaff_efEntities scaff = new scaff_efEntities();
            IEnumerable stu = scaff.students;
            return View(stu);
        }
Now execute the code and you will get following window:-
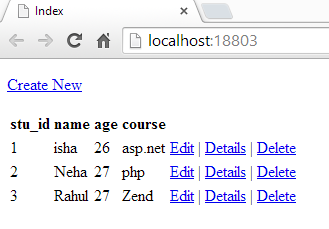 Figure 9
Email Address
For any query you can mail me at Malhotra.isha3388@gmail.com.